Best Telescopes for Astrophotography
ULTIMATE BUYING GUIDE FOR 2020
- Last Updated On:
Introduction
Astrophotography seems to be self-explanatory. Astro (relating to space) plus photography equals taking pictures of things that have to do with space. Pretty simple right?
However, astrophotography is much more than just taking a camera and pointing it up to the sky.
In this guide, we will explain what astrophotography is as well as the telescopes we feel are suited to the task as well as some fun tidbits along the way.
And because we know that it is not easy to choose a telescope when you’re presented with dozens or even hundreds of different models claiming that they are superior, we have compiled a list of best telescopes for astrophotography for your convenience.
Let’s get started with the basics first.
Quick Rundown
THESE ARE OUR TOP PICKS SUMMARISED FOR:
25th April 2024

- Produces aberration-free images
- OTA has StarBright XLT coatings

- 99% Reflective 2-inch Diagonal
- Explore Scientific 1 Year Warranty

- Hoya FCD100 optics
- Carbon Fiber f/7 Air Spaced Triplet

- Fully multi-coated, three-lens ED optics
- Rock-solid, rotatable 3 inch dual-speed (
- 80 mm APO Refractor with ED Schott glass
- 600 mm focal length (f/7.5)
Table of Content
What Makes a Good Telescope For Astrophotography?
What to look for in a telescope that will be used for astrophotography can be somewhat different from a telescope you use if you just want to star-gaze. Here we will go over what we believe to be the type of specifications to look for to have a successful astrophotography experience.
APERTURE:
Aperture is the measurement of the diameter of the lens. The aperture you want for astrophotography isn’t necessarily the same as if you just desired to star-gaze.
The reason for this seems a bit obvious: space is dark. In astrophotography, you want to capture as much light as possible so that you can see the specific thing you’re looking at more clearly as opposed to seeing a lot of things but not as well.
Generally, you want as much aperture as possible and it is hard to imagine a scenario where you would prefer having less aperture than more.
FOCAL LENGTH:
The focal length of a telescope is a measure of how strongly the system converges or diverges light. If this sounds complex, here is the simpler version.
Focal length is the distance that we measure between two points: point A is from the objective and point B is where that light reaches focus.
Focal length is important for astrophotography because it impacts the focal ratio.
Finally, longer focal lengths result in somewhat dimmer pictures, though the difference is not always very noticeable.
FOCAL RATIO:
Focal ratio is most often given in form of an f-number, and we differentiate between fast scopes and slow scopes.
How do you calculate the Focal Ratio?
This is the ratio of the system’s focal length to the diameter of the lens. There are advantages to both having a high and a low f-number, but both also come with disadvantages.
The smaller the f-number, the faster the scope. Furthermore, an f/4 telescope, a fast one, will provide a wider field of view, which is good for deep sky observation; an f/10 telescope is slow, provides a narrow field of view and is more useful for planetary use when you want to zoom in on a specific object.
If you are unsure of what you want to take pictures of, staying in the safe zone of f/6 or f/8 telescopes might be a good idea.
PORTABILITY:
When considering which telescope to buy for your astrophotography purposes, it is important to consider where you will be using it. Will you be taking it with you places or do you prefer to just take photos in your backyard?
These questions are important to consider since it can affect what telescope is best for your astrophotography needs. One of the telescopes we talk about here is 7 pounds (3.18 kg) and another is 97 pounds (ca. 44 kg)—that is quite a difference!
MOUNT:
This may seem a bit strange, but a mount is one of the most important things to consider in astrophotography. Why?
Because the Earth rotates and without taking that into account, your pictures will be blurry or have lines on them because your telescope is staying in the same place but not staying focused on the same thing.
While the so-called alt-azimuth mount is decent and intuitive to use (because it can be moved left-right and down-up), there is a different type of mount available for some more powerful telescopes.
This second type of mount is called an equatorial mount and these mounts move in a fixed direction. They can be moved in a single motion and to a beginner, it looks like the telescope is being moved diagonally.
What actually happens is that the telescope is moving in an opposite direction compared to the Earth, so that you can continue staying aligned to your sky object and it is harder to lose it once your telescope is set up.
Then there is the difference between manual telescopes where you adjust your telescope yourself and ones that are motorized and digitized so that you don’t have to do the all the work yourself.
While astrophotography is possible with different types of mounts, an equatorial mount is often the most practical in case of manual telescopes, while a computerized telescope can be of either type.
APERTURE
280mm
FOCAL LENGTH
2800mm
MOTORIZED
Yes

Mount type
Alt-Azimuth
Overall:
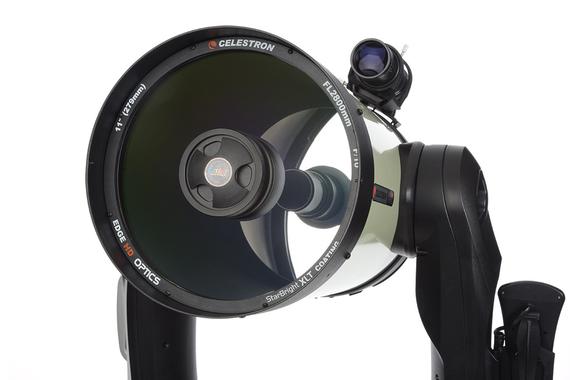
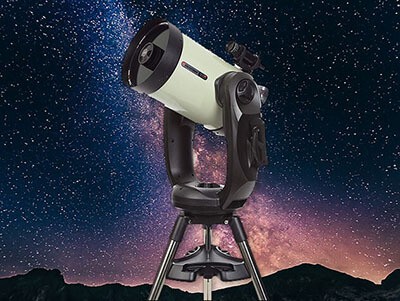
Our first telescope is the Celestron CPC Deluxe, which is a flagship model in the computerized line of telescopes by Celestron. This is a higher-end model by Celestron and while the price is a little bit steep, the results of the huge aperture and high-quality parts are not easily replicated by cheaper models.
The components are very durable and you can be sure that you’ll be able to use this telescope for many years to come.
The massive 11″ aperture combined with the 110″ inches gives us a focal ratio of 10, which makes this model especially useful for astrophotography.
The NexStar GoTo capabilities make it especially useful for long exposure shots.
Fully assembled the telescope weighs 44 kilograms, which is not really portable, but it is not too heavy either considering the size and capabilities.
Conclusion:
The extremely smooth motors, the fantastic software and the great stats of the CPC Deluxe make it an ideal tool for taking pictures with DSLR cameras.
The coma and field curvature correction help to make your aberration-free images even more stunning and accurate. If you invest in this telescope now, you will have a very reliable tool that you will be able to upgrade with additional accessories later on.
Specifications:
- Style: Computerized altazimuth Schmidt–Cassegrain telescope
- Aperture: 11” (280mm)
- Focal Length: 110” (2800mm)
- Focal Ratio: 10
- Focuser: Crayford type
- Mount: Altazimuth
- Eyepieces: 23mm Luminos wide angled eyepiece
- Software/ Database: Starry Night Special Edition; 40,000+ objects; enhanced info on 200+ objects;
- Weight: 97 lbs (44kg)
- Other Features: Internal 16 channel GPS
- Accessible for people with disabilities who cannot adjust the telescope themselves (providing they have someone to transport it)
- Tracking/ Go-To smooth and precise
- Can identify objects and provide the name/size/ location/ magnitude
- Easy alignment—doesn’t require you to know what you’re looking at
- Rather large which can make transportation difficult
- Needs a high output energy source
- Longer exposure can show field rotation
APERTURE
102mm
FOCAL LENGTH
714mm
MOTORIZED
No
Mount type
OTA Only
Overall:
The ES ED102 is a great f/7 triplet for taking sharp images on-the-go. The telescope weighs only 5 and a half kg without a stand, so it can be easy to carry out of the city for a perfect night of sky photography.
The f/7 configuration is a nice middle solution for most astrophotography needs and the optics are superb. The FCD100 optics offer sharp images with little or no aberration because the telescope uses apochromatic lenses.
If you want a high-quality triplet for a moderate price, you may have found it.
Please note that this telescope ships without a stand, without a finderscope and without additional lenses. All of these must be bought separately.
Even when this is taken into consideration, the price is still fair considering the great 2-inch diagonal and the dew shield.
Conclusion:
The biggest problem we had with this telescope was getting all the parts together to make it into an ideal instrument. But looking at it from a brighter side, you can customize the telescope based on your needs and get only the parts that you only wish to pay for.
We recommend it for more experienced users that know what they want to get. After getting all you need, you will be able to enjoy stunning views of the Ring Nebula, Jovian bands and even get great terrestrial views. And you will, of course, be able to take breathtaking images of those objects.
Specifications:
- Style: Air-Spaced Triplet Refractor
- Aperture: 102mm
- Focal Length: 714mm
- Focal Ratio: f/7
- Focuser: 2.5” Hexagonal Focuser
- Mount: AVX mount or comparable (not included)
- Eyepieces: Hoya FCD100 Optics (additional eyepieces available for purchase)
- Software/Database: NA
- Weight: 7lbs (5.44kg)
- Other Features: Vixen-Style Dovetail Plate
- Lightweight
- Retractable dew shield
- Capable of sharp images of objects such as the Andromeda Galaxy
- Hoya glass prevents color fringing
- Does not come with a finder
- Can’t use universal mounts
APERTURE
115mm
FOCAL LENGTH
805mm
MOTORIZED
No
Mount type
Overall:
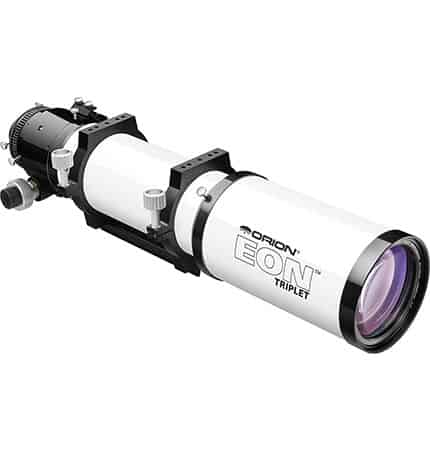
The Orion EON ED is a high-quality triplet that comes with apochromatic lenses, a great focal ratio for astrophotography and a fairly high aperture considering the price. The aperture is very high at his price point and you’re also getting a telescope that is easy to set up and very fun to use.
All parts and the overall craftsmanship are very high quality, which makes handling the telescope very easy.
The apochromatic lens included provides you access to extremely sharp images. The optical tube can be safely supported by most medium-sized equatorial mounts, but sadly no such mount is included.
Conclusion:
While it seems that this telescope has some quirky design choices that seem out of place, it is still a very useful and powerful tool for great astroimages of the moon, nearby planets and far-away clusters.
As long as you can get an affordable mount to go along with the tube, you’ll be very happy to use the EON Triplet both at home and in remote locations.
Specifications:
- Style: Apochromatic refractor
- Aperture: 115mm (4.5”)
- Focal Length: 805mm
- Focal Ratio: f/7
- Focuser: rotatable 3” dual-speed Crayford
- Mount: NA
- Eyepieces: NA
- Software/Database: Starry Night Special Edition digital download
- Weight: 15.2 lb
- Other features: Vixen-Style Dovetail Plate; retractable dew shield
- Style: Apochromatic refractor
- Sharp views of planets & DSOs
- Sturdy case
- Fairly lightweight
- Ships without a mount
- Finder mounting bracket is located on the left side which seems weird for this model
APERTURE
80mm
FOCAL LENGTH
600mm
MOTORIZED
No
Mount type
-
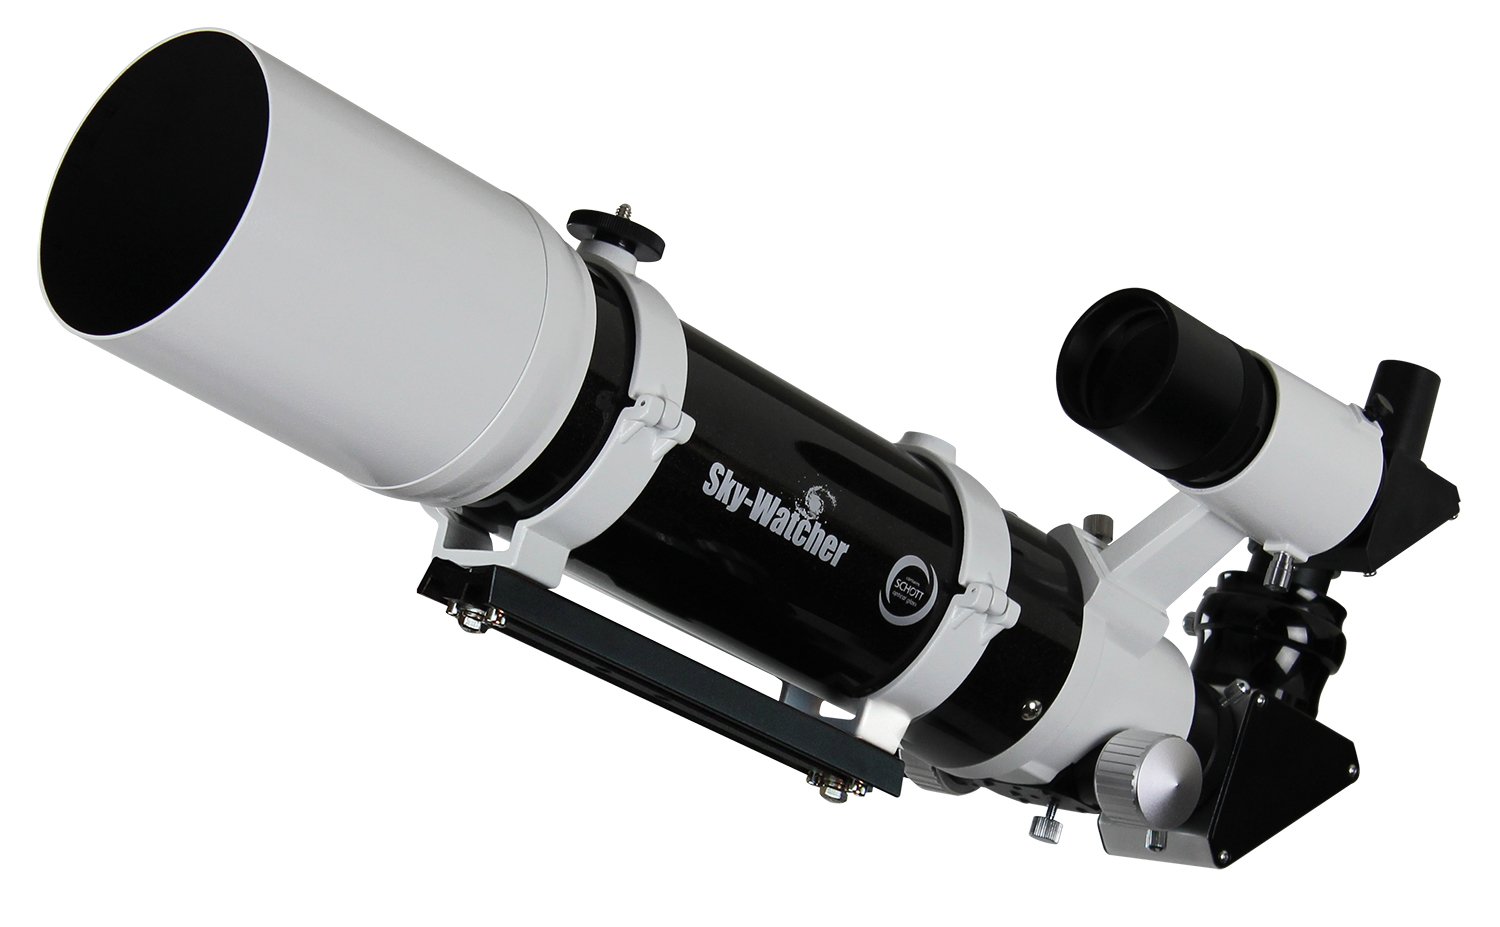
Overall:
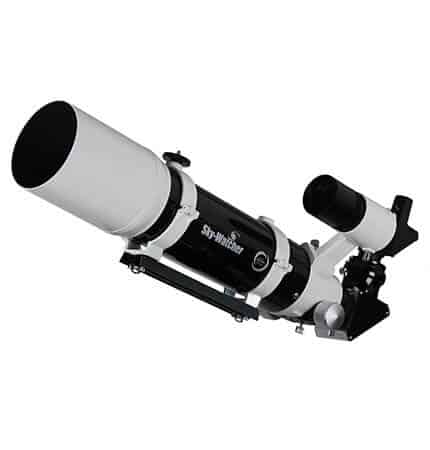
While doublets are not quite as good as triplets, the 80mm Sky-Watcher ProED is a great telescope with apo lenses, a refractor design and a focal ratio of 7.5, suitable for doing astrophotography.
Because of the very moderate price, you will be able to invest in a very good mount that will be useful for long- exposure images.
Keep in mind that doublets are not true apochromatic lenses. The APO designation is often used in marketing as a substitute for “low-aberration”.
This is not a real triplet telescope, so there will be some aberration. But considering the price point, the color correction is more than fine and you will be able to take great pictures with it nonetheless.
Because of the very moderate price, you will be able to invest in a very good mount that will be useful for long- exposure images.
Keep in mind that doublets are not true apochromatic lenses. The APO designation is often used in marketing as a substitute for “low-aberration”.
Conclusion:
The Sky-Watcher ProED is a great mid-range instrument with a lot of modern features and great lenses. You will be able to combine it with different types of mounts depending on your needs so that the end result is a telescope that conforms to your needs and wishes.
Specifications:
- Style: refractor
- Aperture: 80mm
- Focal Length: 600mm
- Focal Ratio: f/7.5
- Focuser: Dual-speed 2″ Crayford-type; 1.25″ adaptor
- Mount: NA
- Eyepieces: 1.25” Long Eye relief in 20mm & 5mm
- Weight: 22lbs
- Good construction
- Multiple eyepieces of high quality
- Fantastic price-performance ratio
- A little bit of pink residue on very bright objects
APERTURE
101mm
FOCAL LENGTH
663mm
MOTORIZED
No
Mount type
-
Overall:
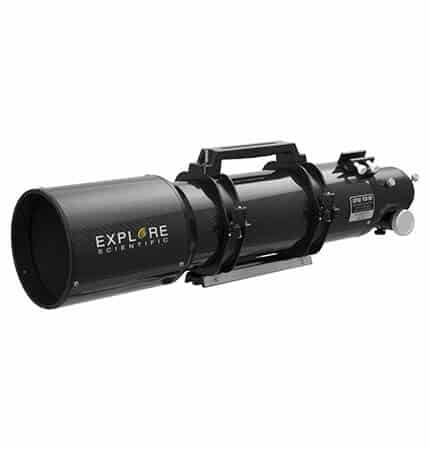
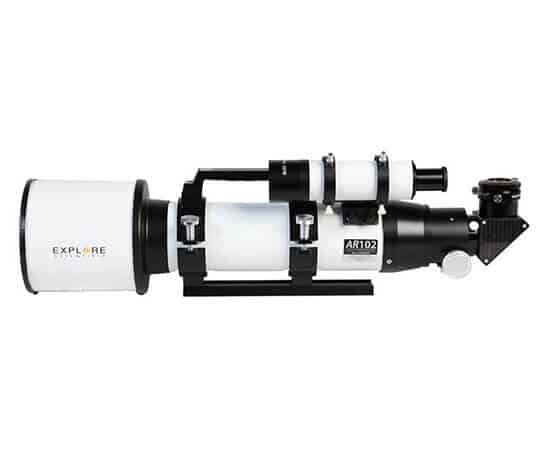
It is amazing that Explore Scientific is offering such a massive aperture for a very little price, but it just shows that you don’t have to spend a lot of money for a good telescope.
The Explore Scientific AR102 is a very solid refractor for beginner astrophotographers and comes with a Vixen-Style Dovetail and a solid 2-inch diagonal.
While this is a simple achromatic refractor that can’t quite keep up with the more expensive models, you will still be able to take sharp images because of the 102mm lens.
If you are on a tight budget, the ES AR102 is more than enough to get started, although you will probably want to upgrade to something better later on.
Conclusion:
It is unfortunate that the AR102 comes without a mount. Considering the somewhat low price that is supposed to attract hobby-astronomers and beginners, they would make your life easier by bundling it with a mount.
If you do a little research, you will be able to find something suitable, though. The good configuration makes it worth it.
Specifications:
- Type: Apochromatic Refractor
- Aperture: 102mm
- Focal Length: 663mm
- Focal Ratio: f/6.5
- Focuser: 2” Hexagonal Focuser
- Mount: NA
- Eyepieces: NA
- Weight: 4.7kg (10.5 lbs)
- Other Features: Vixen-style dovetail; removable dew shield
- Very moderate price
- Solid aperture and good focal ratio for astroimaging
- A lightweight telescope
- The achromatic configuration that will result in some aberration
- Comes without focuser, mount or additional eyepieces
Buying Guide
HOW TO CLEAN AND MAINTAIN YOUR TELESCOPE, MOUNTS, EYEPIECE ETC.
Different types of telescopes will require different methods of maintenance, but there are some basic rules that apply to all models.
Telescopes are very sensitive, even when we are talking about sturdy models.
The lenses, the focusers and the mount mechanisms can get damaged or even broken if handled carelessly. It is important not to leave telescopes in dirty, dusty or wet areas. Getting dirt out of optics is very difficult for beginners, so prevention is definitely the best method to keep your parts intact.
Always avoid touching the optics with your fingers. Our skin produces certain oils that can over time damage the sensitive parts of telescopes.
But don’t overdo it with cleaning, either. A little bit of dust can be removed if it piles up, but things get dangerous when optics get scratched.
When you need to clean it, use only specialized chemicals and clean, soft cloths.
You can prevent a lot of damage to the mount and internal parts of the tube by letting your telescope get acclimated before you start using it.
This is a little bit of a drag, but leaving your telescope to cool down a bit before using it will help all the parts settle in correctly.
Never use a telescope right away after you bring it out of a hot room into a cold garden.
Finally, a lot of companies offer different cases and boxes for each part of the telescope. These prevent damage when the telescope is not in use.
WHAT DO YOU NEED TO START WITH ASTROPHOTOGRAPHY?
ASTROPHOTOGRAPHY CAMERAS
Different models of telescopes are equipped with different mechanisms to attach a camera to the telescope. Some come with gear suited for mobile phones, which is usually a cheaper way to get solid pictures, assuming your phone has a good camera and runs solid software.
However, DSLR cameras for Astrophotography are preferred for obvious reasons. Something like the Nikon D850 or Sony Alpha a7S II would be amazing, but even cheaper models like the Canon EOS REBEL T7i is far better from using a phone.
AN ASTRO-IMAGING MOUNT
Some telescopes come bundled with a mount, while other times you only get the optical tube. It is important to always double check which kind of mount you’re getting, or if you’re getting any mount at all.
Computerized mounts are currently the state-of-the-art solution. Our suggestions for different mounts include the Takahashi EM500, the Paramount ME, and the GM4000.
The decision on this is often fairly objective, but a rule of thumb is that the quality of a mount is tied closely to its price.
ASTROPHOTOGRAPHY SOFTWARE
If you are using a computerized mount, make sure to download all the latest firmware and updates. Sometimes, Mac and Linux users have a problem with this, so don’t hesitate to contact customer support for additional details and help.
Besides this, you want to have some image editing software to tweak the colors a little bit, even if your camera is impressive.
With all of this in mind, let us take a look at our list for the best telescopes for astrophotography on the market!
FAQ
What is Astrophotography?
As mentioned above, astrophotography is more than just ‘point and shoot.’
Finding a good target, having a clear night sky and the right telescope with enough aperture, magnification and little chromatic aberration aligned perfectly is not an easy task.
But what does all of that mean exactly? Let’s first look at how astrophotography came to be.
The first recorded astrophotograph in North America was a picture of the moon taken in 1840 by John William Draper using a daguerreotype(one of the first methods to be able to take pictures). In the almost two hundred years that have followed, astrophotography has evolved both in technique and scope: courtesy of the Hubble Telescope we now have pictures of stars more than 4 billion light-years away!
There are many different ways to take astrophotographs, but the most common way (and the way we will be discussing here) is using a telescope.
Some telescopes have cameras in them but the majority of astrophotographers attach a camera to their desired telescope. Not all telescopes are equally suited for this, but on the other hand, some companies offer models designed specifically with astrophotographers in mind.
Something that you may be unaware of is that an astrophotograph is rarely just one photo taken at one time. This is because the photos tend to either be blurry or just very faint.
You can reduce the numbers of photos taken by trying to get as close as possible to the ideal conditions for making a good picture.
Getting a clear night sky and a computerized telescope that can track the object you want to take a photograph of will have multiple effects: you will have a much greater aperture and focal length than with just a camera, you will be able to capture more details, you can get longer exposure photographs and you can get better colors. This is especially true for deep sky astrophotography.
Finally, there are also a few differences between amateur and professional astrophotography gear. If you really want to take all the high-definition pictures that you see online used for creating interior decoration or desktop wallpapers, you will certainly need to cash out a bit more.
In the other hand If you are more interested in doing it as a hobby when you travel to different places or doing it from time to time, even cheaper telescopes and cameras will do the trick. Using an image editing software is not really illegal either, so don’t be afraid to enhance your pictures.
Which is The Best Type of Telescope for Astrophotography?
REFRACTING VS. REFLECTING TELESCOPES
While there are many different telescopes with many different uses, the two most basic telescope categories are refracting and reflecting telescopes.
A refracting telescope uses lenses whereas a reflecting telescope uses mirrors (it can be hard to keep them straight since the words are so similar, so we recommend thinking about how you use a mirror to see your reflection).
BUT WHICH IS BETTER FOR ASTROPHOTOGRAPHY?
The general consensus is that a refractor is better for astrophotography needs (although like most things, there are those that would disagree). The reason for this is that refractors are not only easier to use, but can fit Deep Sky Objects into view without having to constantly adjust.
Even refractors with relatively tiny apertures (4-6 inches) can show objects far away with stunning clarity!
Some people like to use Schmidt–Cassegrain telescopes. As a rule of thumb, SCTs have a longer Focal Length and thus a higher F-Ratio, making it harder to locate objects in the sky.
The only real advantages of SCTs is that they are, again only as a rule of thumb, cheaper and lighter than refractors.
While you certainly can use them for astrophotography, there are many advantages to using a standard refractor. Two of the benefits of refractors for astrophotography is the Wide Field and Apochromatic Lenses, which we will get into now.
THE BENEFITS OF WIDE FIELD
Wide fields of view are generally more forgiving in terms of mount stability and, even more importantly, in terms of tracking.
Tracking and mount stability are very important for getting a clear and sharp image, especially if you want to use longer exposure times. If you have a longer focal length, your instruments shrink the area of sky you see.
This is due to the greater magnification. That, of course, makes it hard to take pictures of big things like galaxies and bigger portions of the night sky. Shorter focal lengths widen up the area.
THE APOCHROMATIC ADVANTAGE
Chromatic aberration means that different colors will focus at different distances from a lens. This creates blurry, softly overlaid images. Some refractors suffer from chromatic aberration, but many come with apochromatic lenses. Some telescopes are even specialized and have fixed focal length lenses. These are optimized for infinity-like distances, which makes taking pictures of far away objects easier and results in sharper colors.
An apochromatic lens is a compound part that usually has 3 or more elements. It looks like there are three smaller lenses that create one big lens.
After light hits the lens, different wavelengths meet at the same point of focus. This is how chromatic aberration is eliminated.
SLOW AND FAST RATIOS
There seems to be a lot of confusion about slow and fast rations when talking about telescopes. It becomes especially apparent when we are talking about astrophotography because you need to consider the ratios of your telescope and your camera.
A smaller f-ratio means that you require less exposure time to take a picture, which is what makes a telescope or camera “fast”.
If we start discussing how that affects your astrophotographs, things become complicated very fast (no pun intended). Here is an example: the “fast” or “slow” in generally refers to how long a film has to be exposed for a picture to come to life.
A “fast” system (that is, one with a lower f-ratio) delivers a certain amount of light into a smaller area, while a “slower” system (higher f-ratio) will deliver the same amount of light in a bigger area.
Conclusion
Astrophotography can be an extremely rewarding and fun hobby. No matter if you are a seasoned photographer that wants to try out astroimaging, an astronomer with an artistic side, or a complete newbie – you can make amazing images with just a little bit of know-how and good gear.
We tried to offer an extensive palette of different models at different price ranges so that you can compare what you get for your money.
If you want to learn even more about astrophotography, you can check out more of our articles on the topic right here.
We hope you enjoyed this article and hopefully we made your buying decision a little easier!
SUBSCRIBE TO OUR WEEKLY NEWSLETTER