EYEPIECES & ACCESORIES
EQUIPMENT
- Last Updated On:
Eyepieces
When you buy your telescope, it probably came with a couple of eyepieces. These are usually good, but don’t use your telescope to it’s full potential. It’s good to have a selection of different eyepieces, which give you different magnifications from your telescope.
Eyepieces are classified by their focal length. This tells you how much magnification it gives you. The magnification provided by a particular eyepiece is given by the focal length of the telescope divided by the focal length of the eyepiece- for instance my telescope has a focal length of 350mm, so a 25mm eyepiece gives 14x magnification. Eyepieces are generally a standard size. Most telescopes have the 1.25 inch eyepiece holder, so unless its advertised otherwise, and you’ve got a half-decent telescope most eyepieces will fit.
So I want as low a focal length as possible? Not really. Remember that in the telescope section I talked about magnification- that it isn’t so important as most people think at first. 14x magnification seems tiny, but in reality I do most of my observing at this level. The higher the power eyepiece you use, the lower the resolution (sharpness) and brightness of the image.
A smaller but brighter and sharper image is always better than a larger but fuzzier and dimmer image. Also to bear in mind is the size of the hole you have to look through on an eyepiece, the lower the focal length, the smaller the actual lens is, which makes it difficult to look through.
The eye relief is shorter, meaning that you have to get very close to the eyepiece to see the image (especially important for those who wear glasses). This may also be a limiting factor in how high magnification you can use. With higher powers, you have a smaller field of view as well, that is, the amount of sky you can see at one time. A lower power will let you see a larger section of sky. Finally on higer magnifications objects appear to move more quickly due to the Earth’s turning- unless you have a motorised mount you have to keep moving the telescope a lot (on about 70x magnification it’ll take about 30 seconds to drift over the whole field of view).
So I would recommend that you get a good, high focal length (low magnification) eyepiece providing about 15x magnification. This also makes finding objects much easier, and is great for dim things, like stars and deep-sky objects where you need brightness not magnification to get a good view.
If you are looking at bright things however, such as the moon or planets, these are best viewed close up. A low focal length, high-power eyepiece will give you high magnification to be able to see close-up detail on such objects. You should have at least one high-power eyepiece for close-up observing. But there is a limit on the power you can use as I metioned earlier- even bright objects start to appear dim and the image is fuzzy if you use too high a magnification. A general rule is that the highest magnification you can use is your telescopes aperture in millimetres times 2 (or in inches times 50)- for instance on a 70mm aperture telescope, 140x magnification is about the limit.
Those are the general rules, but like everything else, some eyepieces are better than others. For the same focal length on the same telescope, you can have two eyepieces that offer different fields of view. There are other qualities of eyepieces to look out for when your buying an eyepiece:
- Apparent Field of View. This is the field of view you can see through the eyepiece on its own (in degrees). You can get different eyepieces with different fields of view through different lens designs- so wider is better. The true field of view, the actual field you can see when you use it with your telescope is the apparent field of view divided by magnification. Generally you get about 45° FOV, but you can buy (for a lot more money) Ultra-Wide eyepiece that have an 86° FOV, meaning you would see an actual field of view nealy twice as wide on the same magnification.
- Eye relief. As discussed already eye relief is the distance from the lens to your eye that you can see the image at, in millimetres. The longer, the better, as it is easier on your eyes.
- Abberations, Distortions and Off-Axis colour. Like everything else, you get what you pay for with your eyepieces. Flaws in optical quality can produce abberations (fuzziness), distortions, and off-axis colour (blue or red rims around the edges of objects). These are objectionable, and you want to get an eyepiece with as low amounts of these as possible. Also note that on cheaper eyepieces the centre is sharp, but toward the edge of the field of view it gets very fuzzy. This happens on all eyepieces, but is more noticable on cheaper ones.
TYPES OF LENSES
- Barlow Lens. A barlow lens is really worth the investment, and I recommend that you buy one first. Effectively, it doubles the focal length of your telescope, so when used in conjunction with an eyepiece, it doubles that eyepiece’s magnification (you can also buy 3x barlows as well which treble the focal length). The barlow lens goes in where the eyepiece would, but has an open top so that you can insert another eyepiece on top. By using each eyepiece with or without a barlow, you effectively double the number of eyepieces you have!
- Kellner Eyepiece. These type of eyepieces have a couple of lenses together then a third lens. They provide about a 45° FOV, provide quite long eye relief, and are fairly good.
- Plossl Eyepiece. Plossls have two pairs of lenses, and are very good eyepieces, usually a little more expensive than average eyepieces. They have about a 55° FOV and good eye relief, and are excellent eyepieces.
- Ultra Wide. Ultra Wide eyepieces are newer inventions, having systems of 7-8 lenses. They can offer a staggering 82° FOV, so for obvious reasons are called ultra wide, but these are much, much, much more expensive than ordinary eyepieces.
Here’s a really good article by Steve Coe, where I got most of my information from, as I must confess, until recently I was rather confused by all the jargon associated with eyepieces.
OTHER ACCESSORIES
Theres a huge range of accessories out there for telescopes, especially if you own one of the more popular ones. Here’s some of the ones worth thinking about.
ASTROPHOTOGRAPHY ACCESSORIES
If you want to take pictures with your telescope, there are some small things you need to buy, depending on what method you want to use.
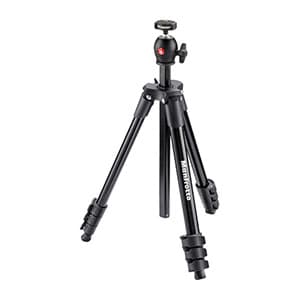
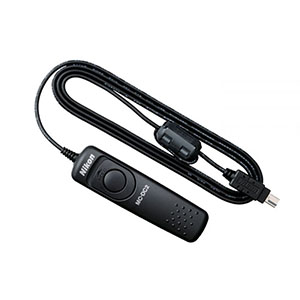
If you’re using a camera only to do star trails, all you’ll need are a tripod and cable release.
If you want to do the piggyback method you could look for an attachment for your telescope, to fix your camera on top of your telescope.
For the afocal method, its worth considering a device which attaches your camera to the eyepiece holder, so that you don’t have to hold it yourself and therefore introduce vibrations: Orion SteadyPix
A T-ring for your camera and telescope camera adapter is needed for the prime-focus method. This basically means using the telescope as a very long camera lens.
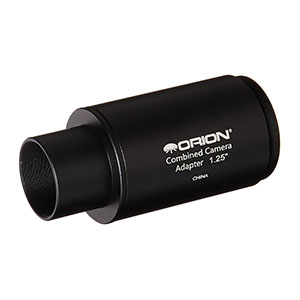
Eyepiece projection is a little bit harder again, to do this you need a T-ring for your SLR camera and an Eyepiece projection camera adapter I found one very cheaply, and although it’s not the most solid of constructions, it works very well.
SOLAR OBSERVATION
I’d better get this out the way first- I’m sorry I have to say this (I know you’re all more intelligent than this but there are some stupid people out there) PLEASE don’t look at the sun through binoculars or a telescope without a filter if you ever want to see again. It will destroy your retina faster than than you can blink and say “ARGH it burns!”.
Anyway… if you want to observe the sun safely, you need some sort of filter. Most solar filters filter out 99.999% of light, that its they reduce the brightness by 100,000. There are two types of solar filter- solar film, and glass filters. These are quite safe if you put them over the objective lens. But I must say… NEVER use a solar filter that is placed at the eyepiece.
Have you ever used a magnifying glass on a hot day to burn stuff? Thats what’s happening to your filter if its at the eyepiece, it will burn a hole in film and blind you, and as for a glass one these have been known to explode under such immense heat! Also, don’t risk trying anything else, anything homemade- there’s no point staking your sight on it to save a few pounds on a proper, safe filter.
Proper solar film, or a proper glass solar filter, placed at the objective however, should be quite safe. At the objective it’s no warmer than the sun on your face. I can’t speak for glass ones as I’ve never tried them, except to say that they are more expensive than Solar Film. Film is sold in sheets of A4, (you need to make sure to get the ‘visual’ film not ‘photographic’ film which doesn’t cut out enough light to look through) and you have to fashion some sort of device to fasten it over your objective. Here are some instructions from BAADER, the people who make the saftey film, on how to make one: BAADER Astrosolar Film or you can buy them pre-made like this one from Agena Astro Agena Astro
I bought a pre-made cell for my telescope, because I’m lazy. It works well- but I must say for my Meade ETX 70 it is a little bit dodgy because the telescope has a slightly tapered end so the filter doesn’t want to stay on- which is obviously risky as if it is knocked while I’m looking through it… it doesn’t bear thinking about. So just check your telescope to see if it has a tapered end before getting one of these.
Please note also, that solar observing is never safe. It’s made less dangerous by a good filter but it still carries high risks. So just always use care and caution when observing the sun. If your solar film appears to have any holes or scratches on it, it’s best to change it rather than take the risk.
SUBSCRIBE TO OUR WEEKLY NEWSLETTER